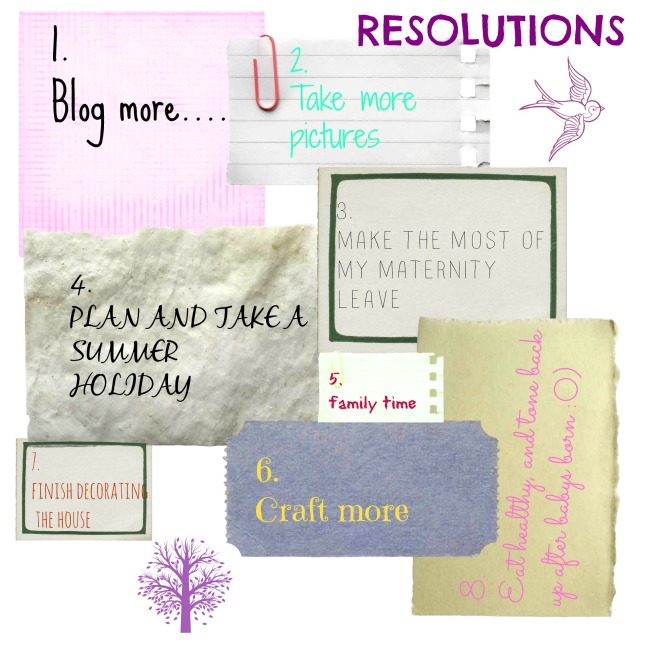
Resolution….

I am not one to sticking too new year resolutions, to be totally honest i don’t think that i have ever made any in my life. I have been thinking about what i want to achieve this year and have made some really easy ones that i should be able to stick too. I will be going on maternity leave in march and have based most of my resolution around the time off i will spend at home with my little family.

So here they are…..


Image

New directions

Morning my lovelys

I have been thinking for a while now that i would like to take my blog to a more personal level. As you are all aware i love to craft and fit this around my family and work life ( which is soon to be growing.) I have decided to add parts of my family life to the blog, what me and little man get up too, life with a new baby and how i will still fit my love for crafting in.

I hope that you all like the direction that this blog will take and continue on my journey with me.

Image

How to ~ Felt flower.

So as promised I am posting a tutorial of how too make a simple felt flower. These are really quick, cute and simple and can be used for loads of craft projects.

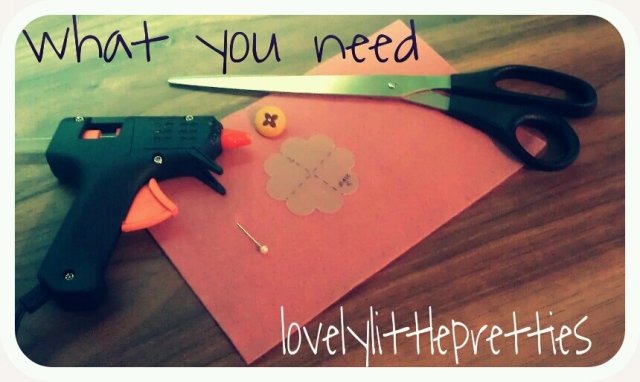
First of all you will need
*felt
*hotglue gun
*scissors
*flower template (mine is from hobbycraft)
*button
*pin
image

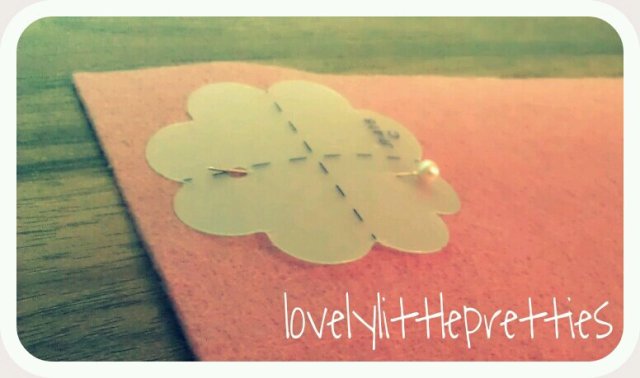
Step one

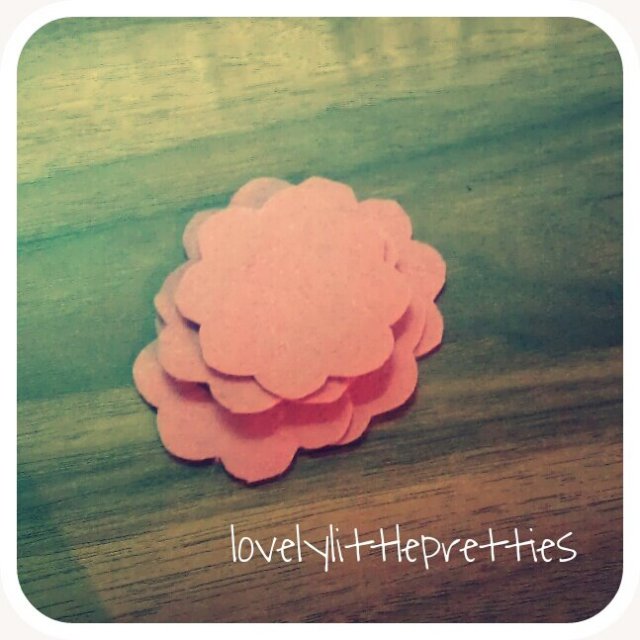
Line your template up and pin to the felt. Remember you we need to get at least 6 flower shapes from your piece of felt.
image

Step two

Cut out the flower template shape from the felt.
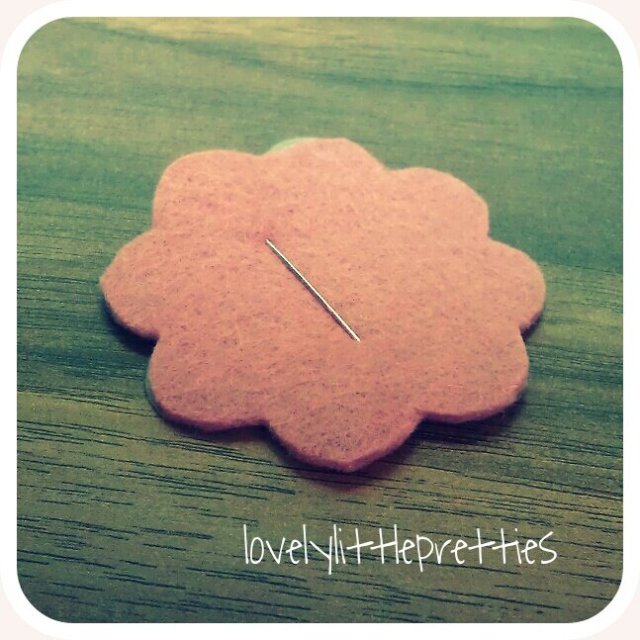
image

You will need to do this at least 6 times, depending on how full you would like the finished flower to look.
image

Step three

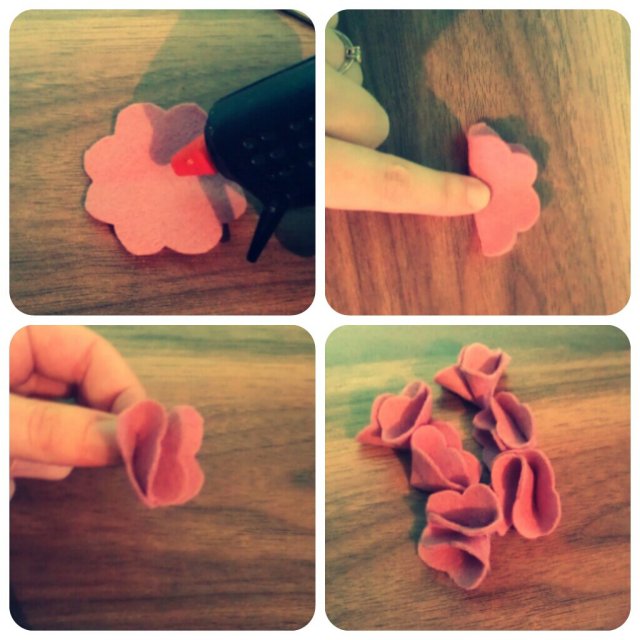
Once you have the required amount of flowers you would like take the 1st flower felt piece and put a tiny dab of hot glue in the center and fold in half, pressing down firmly. Then put another tiny dab in the centre of the folded half and fold again to make a petal.
image

Repeat these process with all the felt pieces you have cut out.

Step four

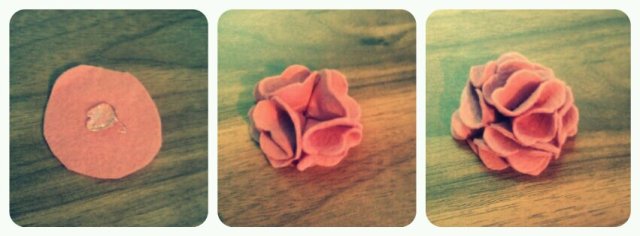
Out of some of the left over felt cut a small circle that will be used as the base for the flower. Put a large dab of glue in the center of the circle and place the “petals” with the point inwards. 4 will make a good base, then place another 2 on top. The flower will look nice a full by this stage.
image

Step 5

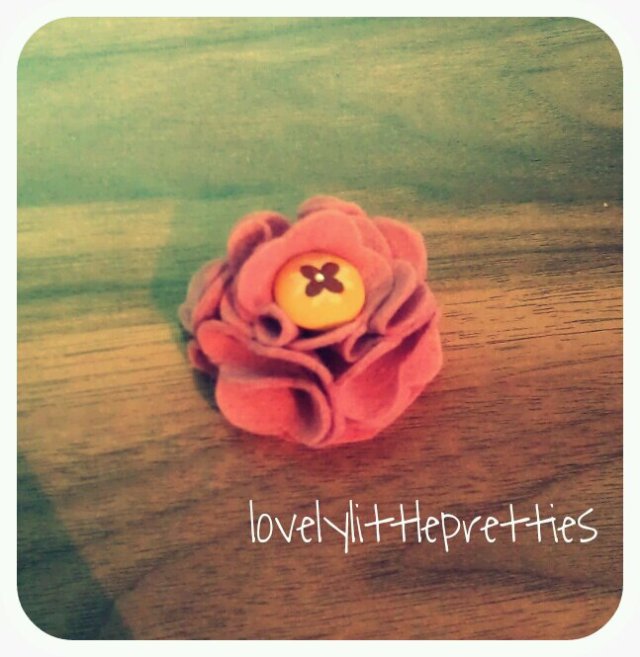
Take the button and glue in the centre of the flower to finish it off.
image

These little flowers can now be used in all different types of craft projects. I will be attaching mine to a babies headband.

Hope you enjoyed :0)

The person behide Lovely little pretties….

So who am i you may ask…. well i thought that i would give you  a peek into my life.

  • I love to craft.
  • I love handmade.
  • I work full time  as a systems clerk in distribution.
  • I’m 31.
  • I am a mummy to a 3 year old boy.
  • I have been with my partner for 6 years.
  • I like to read.
  • I have fibromyalgia / ME.
  • I have a Dog, Cat and two Bearded Dragon.
  • I love pretty things.

Image

New ranges….

Wow its been a while, but i have been super busy with making new ranges for your little lady, along with settling little man in school, and working full time at the “other” job…… I really don’t know where the last few months have gone. But here is a little peek and some of the new things that are ready for the spring collection.

   gracie bow1Charlotteblue

Lucybow1

trio

Pop over to my facebook page on how to order, and keep your eyes peel on a few more ranges that are due to be released in the next few weeks.

Oh and a how too is coming very soon ;0)

Watermark